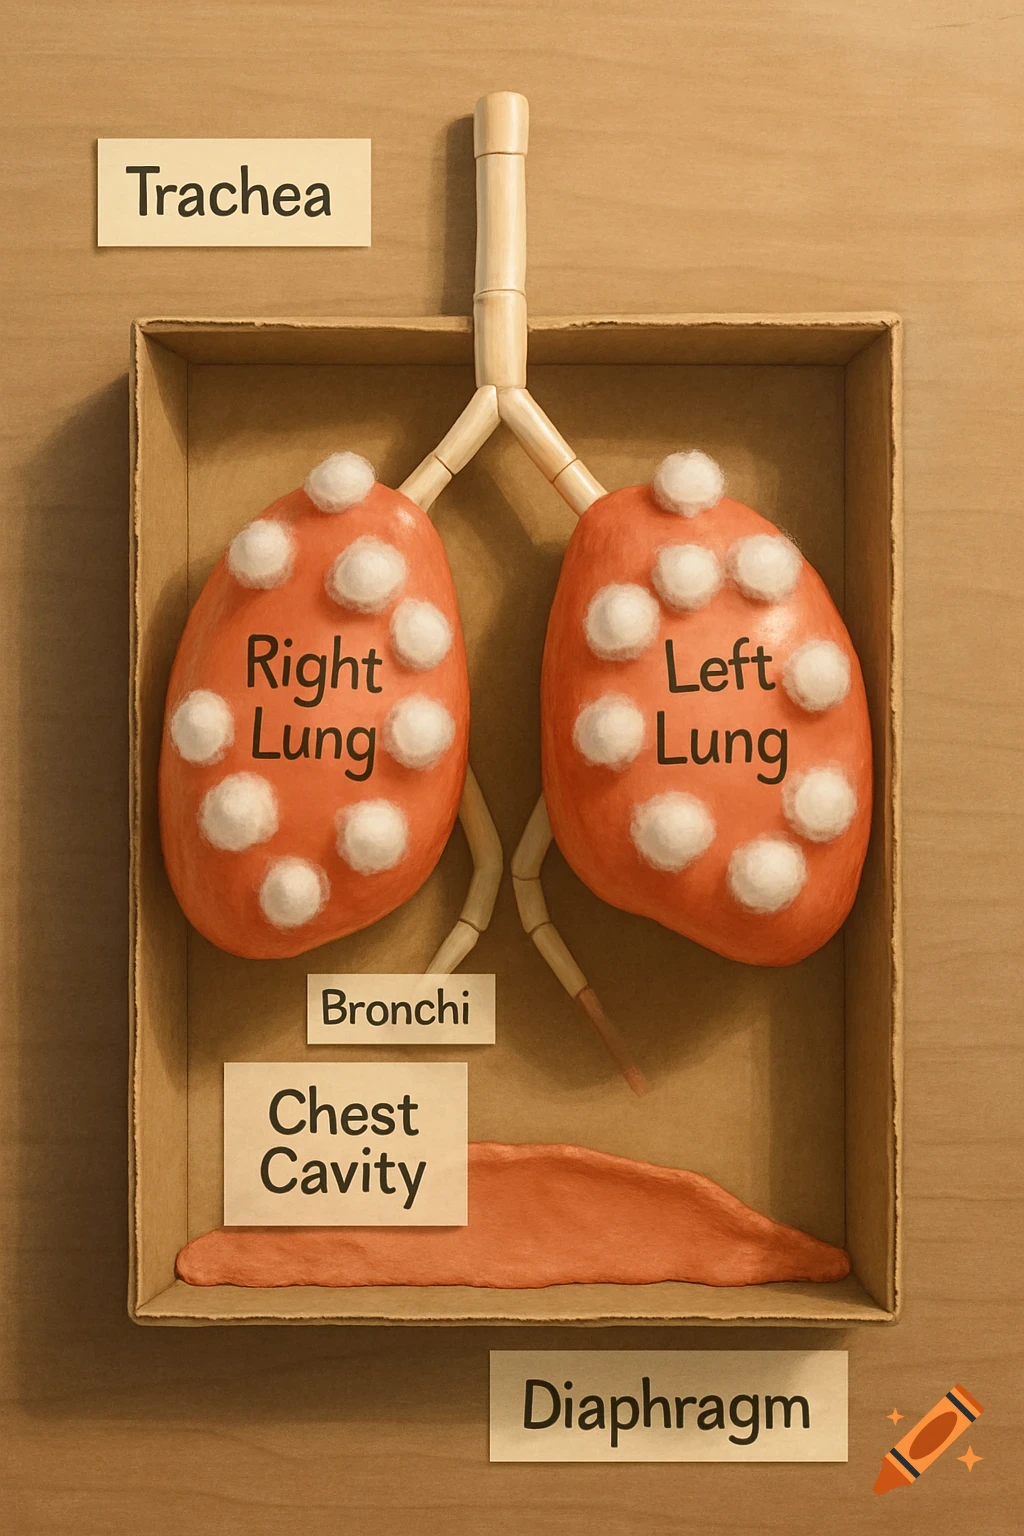
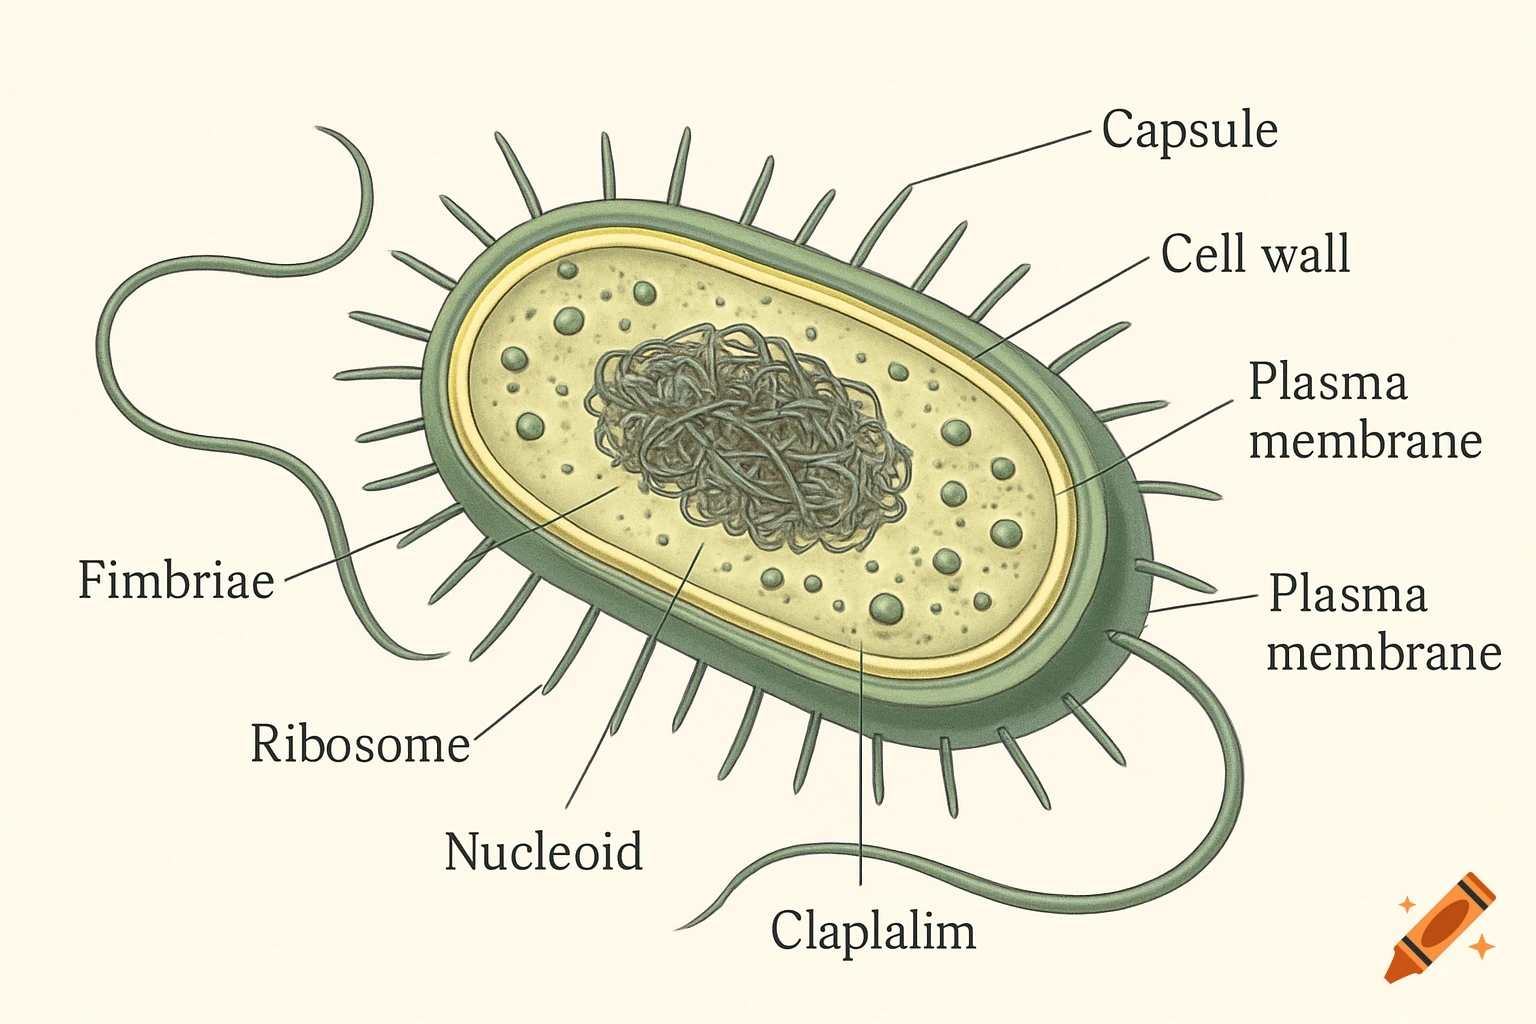
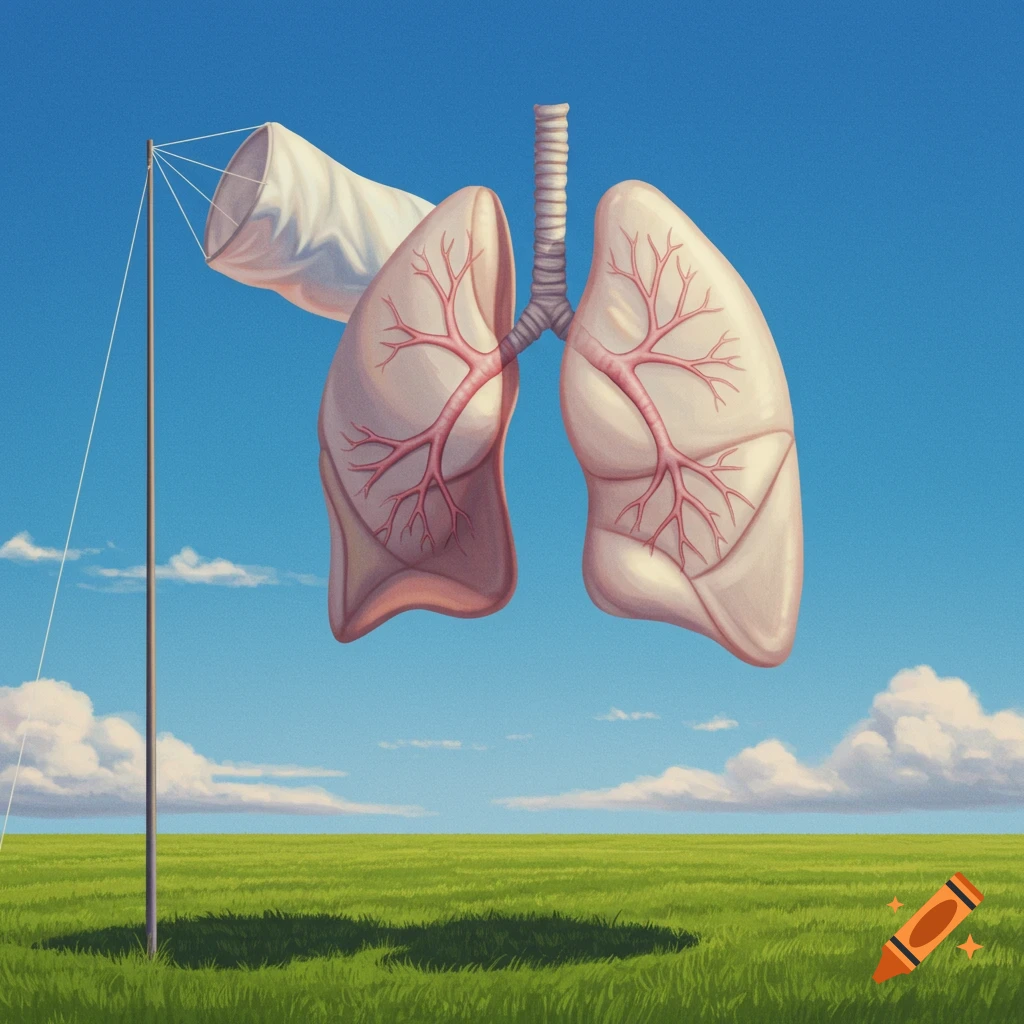
A detailed DIY model of the human respiratory system featuring orange and blue lungs, clear tubes, and labels on a wooden table.
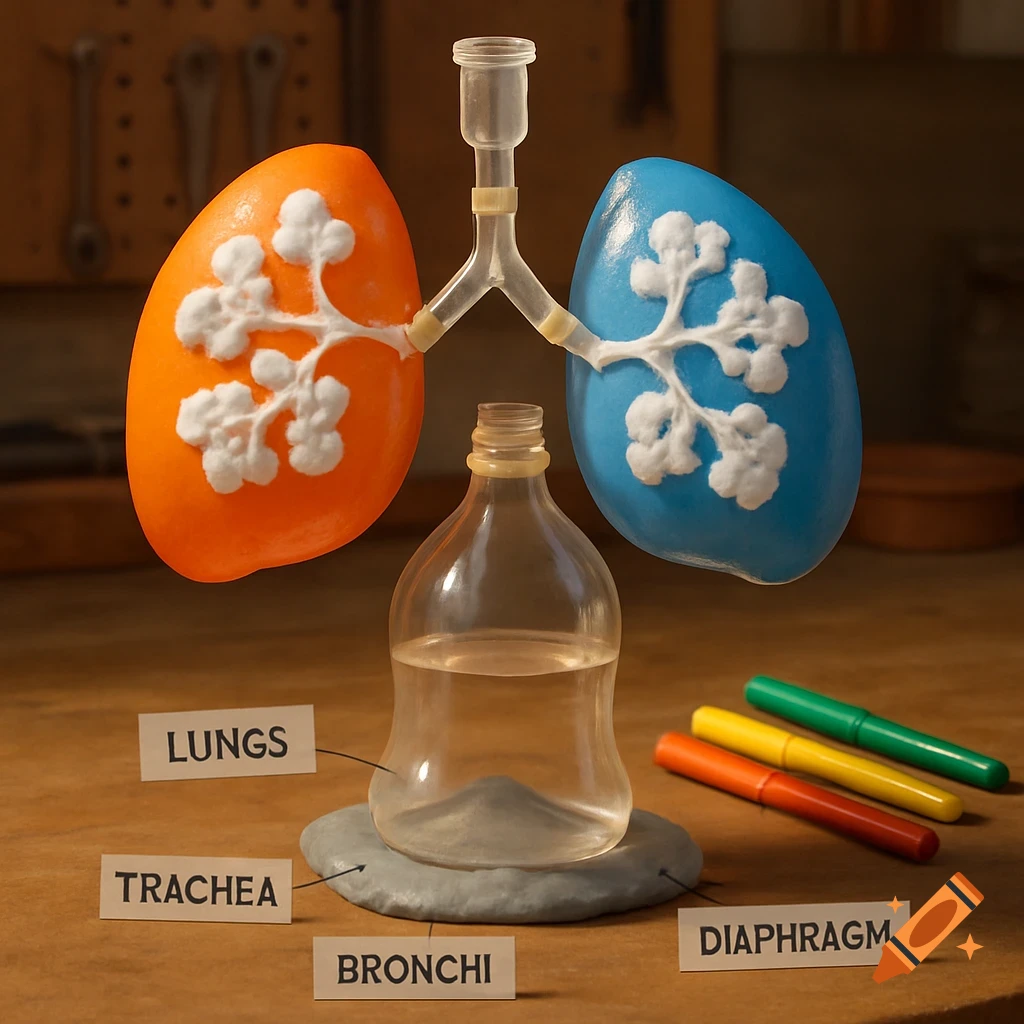
🫁 Respiratory System Model Project Materials Needed 2 balloons (lungs) Straws or small tubes (trachea & bronchi) Tape or glue A plastic bottle(chest cavity) String or playdough (diaphragm) Markers for labeling Optional: cotton balls (alveoli) Step-by-Step Instructions Step 1: Make the Lungs Blow up two balloons — these represent the lungs. If you want, label them “Right Lung” and “Left Lung.” You can glue cotton balls on the balloons to show alveoli (tiny air sacs). Step 2: Make the Trachea and Bronchi Trachea (windpipe): Connect a few straws together with tape to form one long tube. Bronchi: Cut two short straws and tape them to the end of the trachea to make branches. Attach: Tape the two small straws into the mouth openings of the balloons. This represents air traveling from the trachea → bronchi → lungs. Step 3: Make the Chest Cavity Cut the top off a plastic bottle (or use a cardboard box). Place the balloon “lungs” inside. This represents the thoracic cavity (chest area) that holds your lungs. Step 4: Add the Diaphragm Use string or playdough for the diaphragm. If using playdough, flatten it into a sheet and stick it at the bottom of your model (under the lungs). If using string, tape it under the lungs — it will move up and down to show breathing. Step 5: Label and Explain Use markers or small labels to name each part: Lungs Trachea Bronchi Diaphragm (Optional: Alveoli) Step 6: Explain How It Works When you present: Inhale: The diaphragm moves down, lungs expand, air See more